5 Smart Tools in Adobe Express to Boost Your Workflow
- Angelo Montilla

- Jul 9, 2025
- 4 min read
In this tutorial, let me show you 5 amazing smart tools in Adobe Express that will save you tons of time in your creative workflow.
Whether you're working on social media content, presentations, or quick client mockups—these tools are fast, powerful, and beginner-friendly.
Before getting started, you can download the PDF documents and upload them to Adobe Express to follow along step by step in this tutorial. Click the link below to download the PDFs and other assets so you can follow along step by step.
In the case where there are PDFs, simply upload them as new projects to Express and apply the steps in the tutorial.
1. Convert to GIF
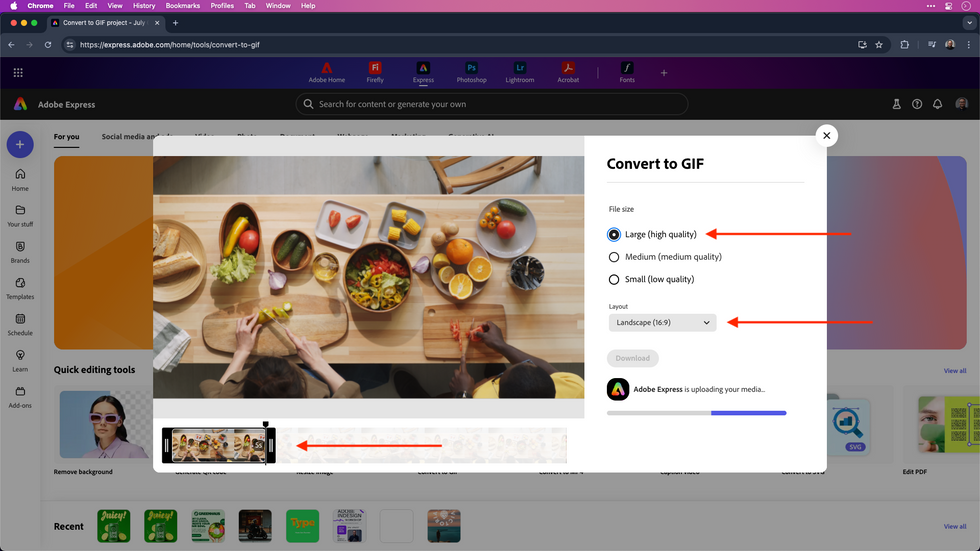
Let’s kick things off with Convert to GIF. Whether you're working with a short video clip, slideshow, or just want to add subtle motion to your project, this tool helps you convert video to GIF in seconds.
To access the Convert to GIF feature, click the Plus icon and then Quick Actions.
Click the Convert to GIF option and then drag the short video clip included in the exercise folder.
The video is 20 seconds, which is typically too long for a GIF so let’s trim the video by dragging the right-side handle of the timeline to about 5 seconds.
Choose your aspect ratio – for this example I’ll leave it on landscape – and the video quality. For this example, I’ll set it to Large and click Download.


Now that the GIF is ready, I can embed it into an email and send it along in a newsletter or event promotion.
Simply open the email and drag the GIF into the body of the email and it will automatically play once it’s been embedded.
2. Remove Background
Next up—Remove Background. If you’ve ever spent time selecting a subject in Photoshop, you’re going to love this time-saving tool.
To access Remove Background, click the plus icon and choose Quick Actions.
Select Remove Background and then drop your image in. The image of the toucan is included in the tutorial exercise files.
Express will automatically detect the subject or subjects in the image and remove the background.


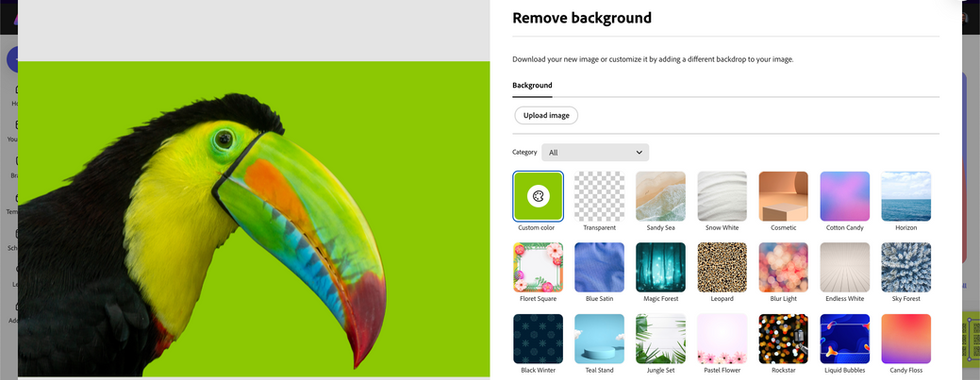
From here, you can download the image with a transparent background or add your own background from the preset selections.
If you have an existing project on the go in Express, you can also drop an image in and use the Remove Background option in the left menu for the same result.
With a project open, drag and drop your image onto the page.
Click the Remove background from the left menu options and then resize and reposition the content as required.


3. Remove Object
Next, let’s take a closer look at the Remove Object feature. This handy tool allows you to quickly remove distracting objects from a photo without having to open the image in Photoshop to perform the same task. Quick, easy and right in Adobe Express.
To access the Remove Object feature, click the plus icon and select Remove Object.
Open the image from your computer and from the left menu.
In this example, I’d like to remove the street post in the foreground and the sign on the wall in the background. Both are distracting objects taking away from the main subject.
First, choose the size of the brush and then paint over the street post. Once you have the post selected, you can paint over the sign in the background as well.
As a final step, click Remove.
Now sit back and once again watch Express work its magic to remove both of those objects from the composition.


4. Generate Text Effects
Want to spice up your text? The Generate Text Effects tool lets you create stunning, stylized typography in just a few steps.
In this example, click the title to bring up the text options menu on the left side.
Click the Effects tab and then Generate Text Effects. Here, you can choose from the several pre-set options, but in the example, we’ll be creating our own effect to match the style of the ad.
Click the pencil icon and enter the text prompt, which in this case is lime peel texture with water droplets. You can also try Lime Peel Texture on its own to see which gives you a better result.
Click Generate and choose one of the initial variations. If you’re not satisfied, just Click Generate again to generate another set.


5. Resize Video
The final smart tool we'll cover in this tutorial is Resize Video. This is such a handy tool when repurposing video content for other social media platforms.
To access the Resize Video tool, click the plus icon and then choose Quick Actions.
Click Video from the sub-menu and then choose Resize Video.
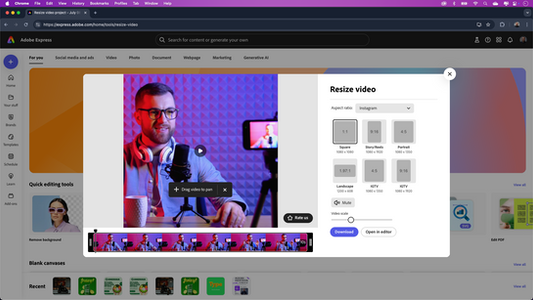
Drag and drop the video into the upload box.
Once it's been uploaded, choose the platform you would like to resize the video for. In this example, we'll leave it on Instagram.
Choose an aspect ratio available for Instagram. For this example, let's choose 1:1 (1080x1080)
Click Download to save the video to your computer.


You're now ready to share the resized video on Instagram!


