Learn how to add a gradient feather, text wrap to magazine layouts
- Angelo Montilla

- Apr 20, 2021
- 2 min read
Updated: Dec 2, 2025
Adding text over an image with a busy background can be challenging at times. It may even discourage you from attempting creating an editorial design layout with text on an image. However, adding a simple effect over the image and pairing it with a text wrap can really bring your layout to life.
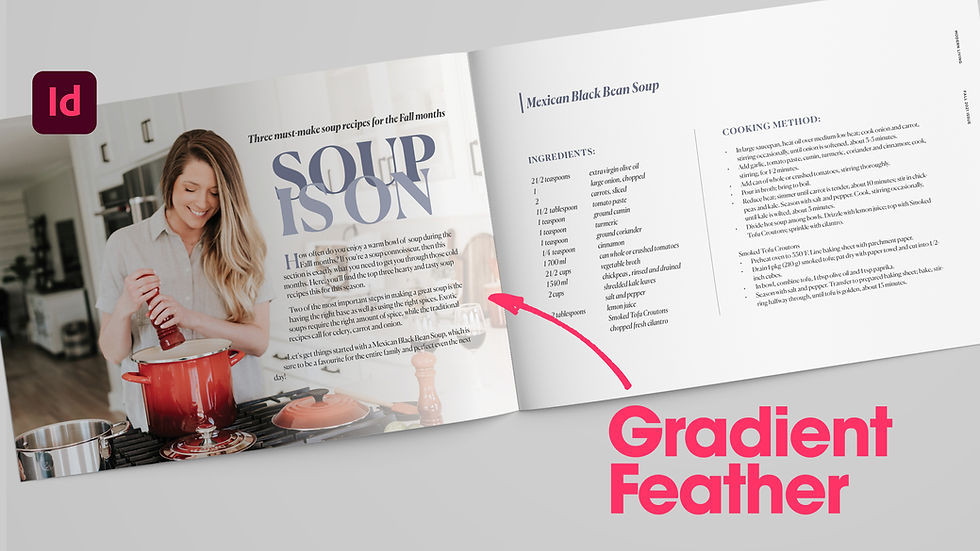
In this lesson, learn how to add a gradient feather effect over a main image and pair it with Adobe InDesign's new Text Wrap Select Subject to create a stunning editorial design layout. I used this technique in the example you see above, and in this lesson, you'll learn how to do the same.
So let's get started.
First, find an image that you'd like to add text on top of. If you want to use the same image I used in this tutorial, you can download it from Unsplash here.
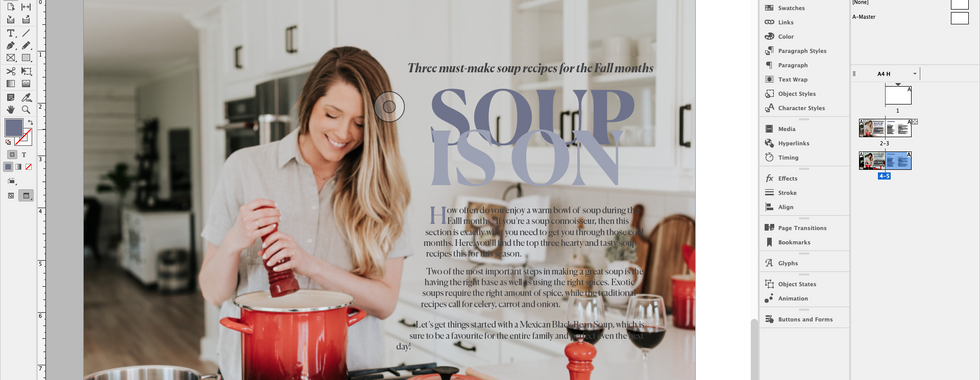
Gradient Feather
Select the Rectangle Frame Tool.
Click and drag a frame over the area of the image where you'd like to have the gradient feather.
In the Swatches panel, select the colour you want the feather to be. For best results, for either black or white.
Go to Window > Effects to open the Effects panel.
Click the Fx icon in the bottom right and select Gradient Feather.
In the dialog box, move the white colour stop all the way to the left and the black stop to the right.
Adjust the mid slider to your liking. In this case, it's more to the left - closer to the white colour stop.
Set the angle light source by rotating the indicator in the circle or typing in a degree value of your choice.
Click OK.
Here's a look at how the gradient feather effect will look using the steps explained above.


Now that the gradient feather has been set up, a great option is using InDesign's Select Subject Text Wrap to wrap body text around the subject in the photo. This is a great way of applying a text wrap to a photo without having to worry about removing a background.
How does it work? Well, Adobe InDesign detects the subject in a photo – even if it has a distracting background like the one in the image above.
Here's how it works.
Select Subject Text Wrap
Click on the image once with the Selection Tool.
Open the Text Wrap panel, which can be found by going to Window > Text Wrap.
In the Text Wrap panel, click the third option to wrap around object shape. This will likely knock the text out of place or cause it to disappear – but don't fret!
In the Contour Options dropdown, change the selection from Same as Clipping (or whatever setting it may be on) to Select Subject. From here InDesign will detect the subject in the photo.
As a final step, increase the text wrap offset – adding more space between the image and the text in the image.
Here's a look at how the Select Subject Text Wrap will look using the steps explained above.