Use Adobe InDesign & Photoshop to create animated GIFs for social media
- Angelo Montilla
- Oct 29, 2021
- 3 min read
Updated: Dec 16, 2025

If you're looking to create an animated GIF for social media posts, the process should begin in Adobe InDesign and end using Photoshop.
This power combo allows you to design the storyboard of the GIF using pages in InDesign, exporting them as PNG or JPGs and creating frame animations in Photoshop.
Creating animated GIFs can be even more visually appealing and may often result in viewers stopping to consume the content you are sharing rather than swiping through to the next post. This is particularly even more crucial for companies and organizations looking to post engaging content to promote an event or product.
The first step is setting up the document in InDesign to the size you're planning to use for social media. For example, in this lesson I created a 1080 x 1080 for an Instagram post. If you're uncertain of the exact size you need, this amazing – and always updated – resource from Sprout Social is nice to reference as you're working.
Add 10 pages to the document as we'll work through adding the storyboard frames for the GIF animation.
As always, the content for this lesson is available for download so you can follow along in the tutorial.
Building the GIF storyboard in InDesign
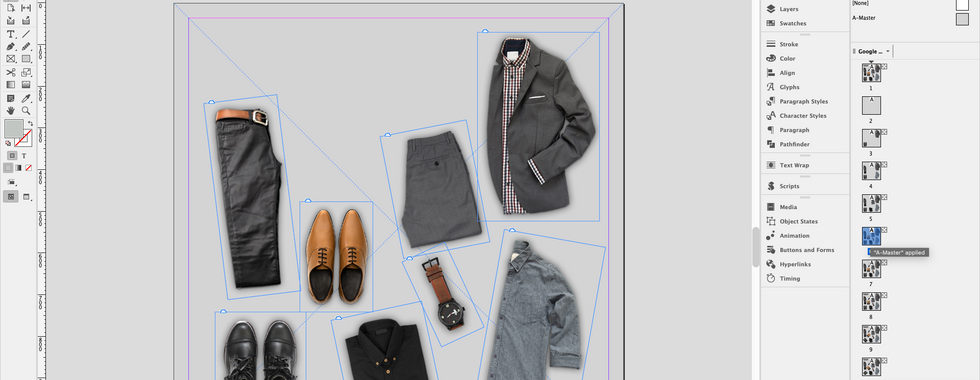
Use the first page in the document to create the layout, using the clothing items and logo for this fictional men's fashion brand – Halton Hills.
Leave Page 2 blank – this will be the start of the GIF animation.
On Page 3, add two of the clothing images of your choice. For this, copy them from the main layout on Page 1 and go to Edit > Paste in Place to place them on Page 3. Use the Paste in Place technique to paste these images on the remaining pages in the document.
On Page 4, add two more clothing images using the same Paste in Place technique. Then paste them again on the remaining pages in the document.
On Page 5, add two more clothing images using the same Paste in place technique. Then paste them again on the remaining pages.
Repeat the same steps until all the clothing items and logo have been placed as seen from the Page 1 layout.
On Page 9, click on the image of the brown pair of shoes and with the Selection Tool, hover over the top right corner and rotate the frame -45 degrees. Repeat the same for the black pair of shoes.
On the last page, click on the image of the brown pair of shoes and with the Selection Tool, hover over the top left corner and rotate the frame 45 degrees. Repeat the same for the black pair of shoes.
Here's a look at how the pages should look in your InDesign storyboard for the animated GIF project.


Export the pages as JPGs by going to File > Export and choosing JPG as the file option.
In the Export options window, set the Quality to Maximum choose 72 ppi Resolution.
Click Export.
Now that the pages have been exported, you can now open Photoshop, where we'll create the animated GIF.
Creating Animated GIF in Photoshop
Once you have launched Photoshop, go to File > Scripts > Load Files into Stacks.
In the Load Layers dialog box, click Browse and locate all the JPGs exported from InDesign.
Click OK
In the Layers panel, ensure that all the images are there and in the order as they were exported from InDesign. If they are not, click and drag within the Layers panel to set the proper order.
Before we go any further, open the Timeline panel, by going to Window > Timeline.
Click Create Frame Animation – this will create an initial frame in the timeline, which should be the first layer, the blank image.
In the Timeline options icon, choose New Frame.
With the second frame selected in the Timeline, go to the Layers panel and turn off visibility of first layer.
In the Timeline options icon, choose New Frame.
With the third frame selected in the Timeline, go to the Layers panel and turn off the visibility of the second layer.
Repeat these steps until you have all the frames in the Timeline.
You will need to create two or three additional frames in the Timeline to toggle between the rotated shoes so that they appear to be going back and forth when exporting the final GIF.
To export the final GIF, go to File > Export > Save for Web (Legacy).
In the Preset, choose GIF and GIF 128 Dithered.
In the Looping Options, choose Forever.
Click Save
Here's a peek at the steps mentioned above.


Follow along in the video tutorial to see how the GIF looks when shared on social media.