Create Compelling Brand Identity Layouts with Adobe InDesign
- Angelo Montilla

- Mar 6, 2019
- 3 min read
Updated: Dec 2, 2025
Brand Identity doesn't stop after logo design.
In fact, everything that follows the creation of a mark is what connects the consumer base to a product, person or thing.
Visual components and the most recognizable part of a brand's identity include colours, patterns, typography, logo, website, packaging, signage, letterhead and stationary, just to name a few.
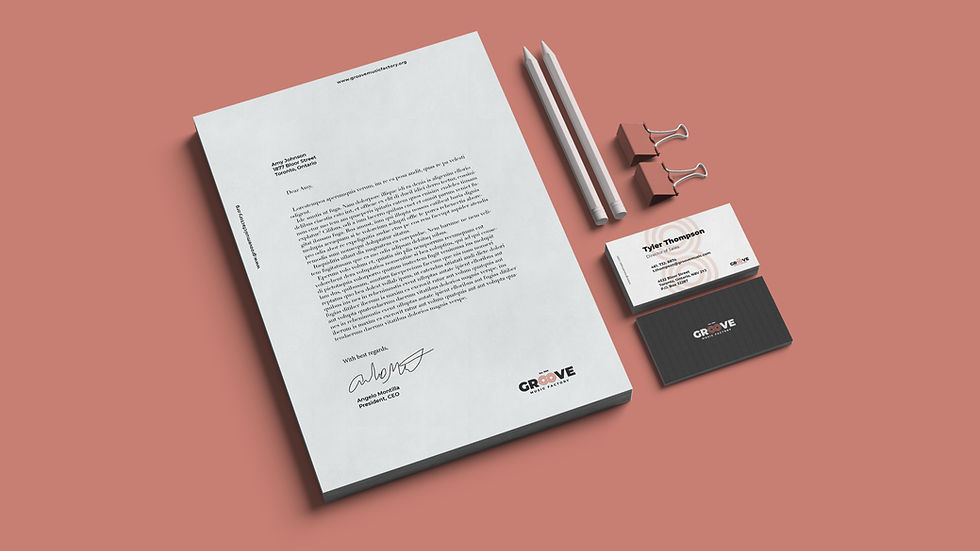
In this latest tutorial, I focus on how to create letterhead and business cards in Adobe InDesign for a branding concept called Groove Music Factory.


Letterhead Design
One of the first things I think about when designing letterhead for a client is planning out the back side of the project. This is essentially what will capture your audience's attention from the beginning.
Using brand colours, patters or repetitive shapes can make your letterhead stand out.
This document size is A4 and I created guides that have four columns and eight rows.
In this case, I used the icon in the logo as a pattern and also added a larger version coming out of the corner.
Try different concepts and give yourself a variety to choose from before picking one that suits you and eventually, your client.
The front of the letterhead should contain key information about the business. First and foremost, it's crucial to have the logo placed at smaller scale somewhere on the layout. As you can see in my version, I placed the Groove Music Factory logo in the bottom right corner, but you can move it around the page and see what works best in your situation.
Use additional negative space to place a website, tagline or email address. The content will change with every client, but this gives you a good idea of how to move your type around a page to get the result you're hoping for.
Adding a signature to your letterhead can also be done in InDesign. Use the Pencil Tool to write your name using a stylus pen and tablet. It will be more difficult to accomplish this with a regular mouse.
Select parts of your signature and group together (OBJECT > GROUP or COMMAND + G) so you can move it in the space between your greeting and name/title.
Business Card Design
When setting up your business card document in InDesign, select the U.S. Business Card option offered under the print tab. I prefer to set my margins to 0.1875, but that is based on your preference. I also set up guides that have four rows and four columns from the margins.
When it comes to business card design, because you're designing on limited space, it is essential to get in the key information without crowding the overall layout. Remember, you don't have to get in every contact number, every social media tag. Keep it limited to the key contact information and this will result in an effective design in the end.
To set up or change your margin dimensions, go up to LAYOUT > MARGINS AND COLUMNS. This is where you will be able to change the margins to your specifications.
To finish off my card, I added the icon one last time and scaled it larger enough to bleed off the page at the top and bottom. I then adjusted the opacity to 25% for a subtle look and so it doesn't compete or interfere with the content already on the card.

When you are finished designing, export your artwork as JPG or PNG format. This will allow you to place it in a digital mockup before sending off to clients or using it in a case study to build your portfolio.


