Learn how to Generate Static Captions in Adobe InDesign Layouts
- Angelo Montilla
- Jan 1, 2020
- 2 min read
Updated: Dec 2, 2025

Whether you're building a catalogue or working on an editorial design with multiple images throughout a document, the Static Captions feature in #Adobe InDesign comes in handy and is a time-saving tool.
Static Captions allow designers to generate and import captions at once rather than do them individually with each image within a document.
So how is this done?
Firstly, it's important that every image in your layout has a Metadata Description. In simple terms, think of this as the caption that's built into the image file you want to place.
Follow along as I go over the process of how to add Metadata Description in Adobe Bridge before generating the Static Captions to multiple images in Id.
Adding Metadata Description in Bridge
Open Adobe Bridge and navigate to the folder containing the images you'd like to add into the Id layout. This can be found on the left hand side of the Bridge interface.
Click on the first image and navigate to the Metadata tab in the bottom right hand side. With the Metadata tab selected, scroll and drop down the IPTC Core options.
Navigate to the Description field and type in the caption for the specific image selected.
Click the next images and repeat the same process.
Close Bridge if finished.

Now that the Metadata Descriptions have been added into the image files, it's time to generate throughout the document in InDesign.
Before generating the captions, however, there's one more step and that's setting the caption formatting. This can be done as follows:
Static Caption Setup
Go to Object > Captions > Caption Setup, which bring up a dialog box to make preferred adjustments.
In the Metadata dropdown, be sure to choose Description from the options given.
Under Position and Style, select where you'd like the captions to appear. In this example, I have Below Image.
In Paragraph Style, it's strongly encouraged to create a caption style rather than use the No Paragraph or Basic Paragraph options.
Set a positive Offset to give some space between the caption and image. No doing this step may result in the caption sitting much to close to the images.
Click OK.

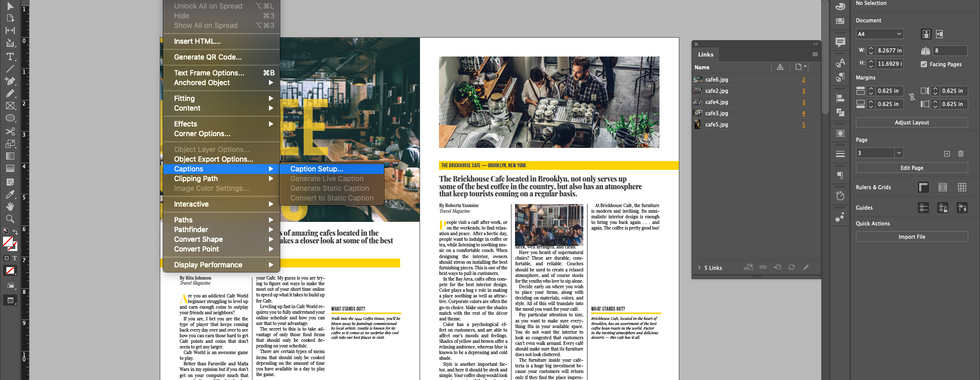


Now comes the fun part — generating the Static Captions! Before this step, be sure that the Links Panel is open. By default, it should be, but if it's not open go to Window > Links.
Generate Static Captions
Open the Links Panel, you should see all the images in your document listed here.
Click on one, hold the Command or Control key and select the others. To select all images, click the first, hold Shift and click the last one on the list.
With the images selected, right click go to Captions and Generate Static Captions.

You may have to go in and adjust the text wrap if the captions are inside body of text. To do this, just click on the caption with the Selection Tool, open Text Wrap and adjust the bottom wrap field to create more space.
There you go! Captions added into an entire document simultaneously rather than individually. It's a time-saving tool to use on a reguular basis.